Enabling Local Configuration Page (HTTP Interface) of the Ethernet Gateway 4 through iMonnit
If you are attempting to configure your Ethernet Gateway 4 using the local configuration page (HTTP Interface) using iMonnit
The Ethernet Gateway 4 has DHCP enabled by default. As there is no default IP address for this gateway (which differs from the Ethernet Gateway 3), it must be connected to a network that supports DHCP in order to first connect the gateway. In order to do this, you will need to find the IP address that is assigned to the gateway via DHCP from your network. This often requires you to view the IP assignment in your DHCP server (router).
Enabling the local configuration page (HTTP Interface) of an Ethernet Gateway 4 using iMonnit Online
The Ethernet Gateway 4 offers a local configuration page through which you can modify gateway configurations locally. The page is accessible through a web browser by visiting the gateway’s IP address. The Interface is disabled by default, so it must first be activated to access it. The interface does have an option which will allow you to activate the interface permanently if so desired. This article will provide information on the functionality and steps to access this interface.
Summary of Steps
- Connect the gateway to a network that supports IP assignment via DHCP.
- Activate the HTTP Interface (local configuration page) using iMonnit Online.
- Access the gateway’s local configuration page through a web browser.
- Configure the gateway.
Connect the gateway to a network that supports IP assignment via DHCP
Connect the gateway to a local Ethernet network that supports DHCP, and power the gateway on. Once the gateway receives an IP address, the bottom LED will go green. This indicates the gateway has a valid IP and local connection to the Ethernet network. You will need to find the IP address that is assigned to the gateway (which might require you to check the IP assignment from the DHCP server). Once the gateway is communicating with iMonnit Online, you will be able to enable the gateway’s HTTP Interface. To do this, follow the steps below once the gateway is checking in with iMonnit Online.
Activate the HTTP Interface (local configuration page) through iMonnit Online
- Log into your iMonnit Online account to which the gateway has been added.
- Click Gateways in the left hand side bar.
- Select the gateway for which you want to enable the HTTP Interface.
- Click the Settings tab.
- Click the Interface sub-tab.
- Click On for the HTTP Interface to enable the local configuration page.
- Once the gateway checks in, it will accept the configuration and enable the interface.
Access the gateway’s local configuration page through a web browser
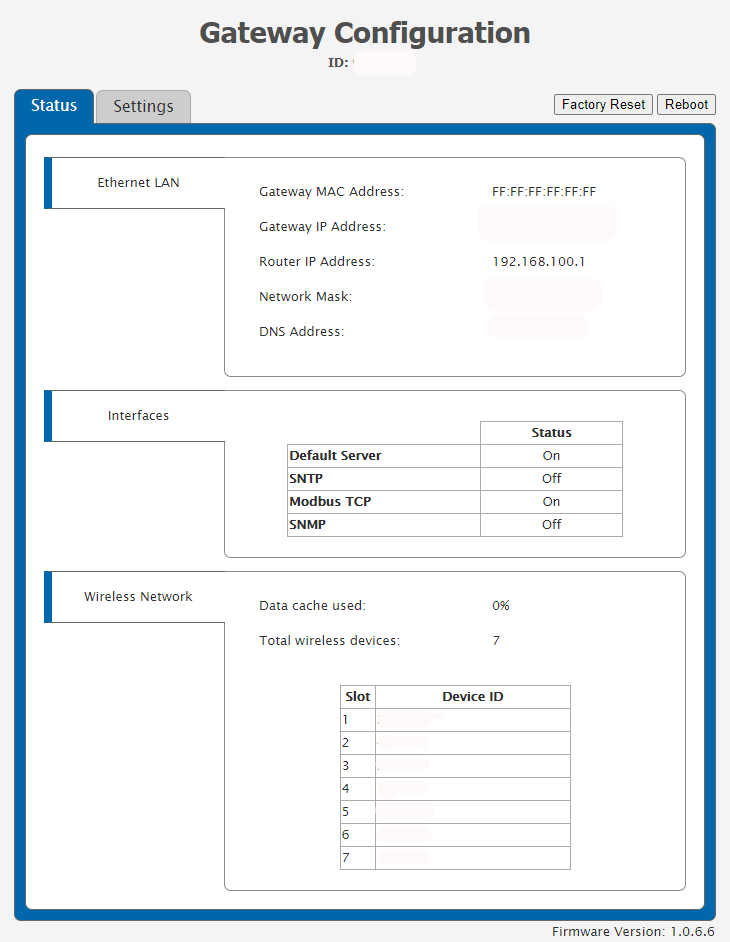
If you correctly activated the HTTP Interface, you will see the local configuration page when visiting the IP address of the gateway in a web browser from a computer on the same local network.
Configure the gateway.
It is worth noting that sensor configurations cannot be modified through the gateway’s HTTP Interface. In order to change sensor configurations, the changes must be made through Monnit software (iMonnit Online, iMonnit Enterprise, iMonnit Express, or a Monnit MINE server). This does mean that customers operating on a private network with the Default Interface disabled will need to configure the sensors with desired settings using Monnit Software prior to disabling the Default Interface.
At this point, you can use the gateway’s local configuration page to modify gateway settings. The most common configuration change that is made, is the assignment of a static IP address. Although, the gateway offers many configurations that can be accessed through the HTTP Interface.
Special Consideration for customers operating with the gateway on a private MODBUS TCP or SNMP network: For customers that are not using the gateway with the Default Interface (iMonnit Online, Enterprise, Express, or MINE), it is worth noting that you can enable/disable the Default Interface through the HTTP Interface. In order to do this, the gateway must be Unlocked. If you are operating with your gateway in this manner, you may see disruptions in the gateway’s operation if the gateway is not Unlocked and the Default Interface disabled.
Conclusion
The Ethernet Gateway 4’s HTTP Interface (local configuration page) allows for dynamic changes to be made to the gateway. If you have any questions regarding the access of the HTTP Interface, feel free to contact Monnit Support.