How to Apply a Gateway Unlock Code in iMonnit
Before you can point a gateway to your custom host or IP address, you must unlock it, if it wasn’t purchased already unlocked. Gateway Unlock Codes can be purchased here. If your gateway is not unlocked, it must communicate with iMonnit using a local or cellular network on port 3000 to receive the unlock command.
Supported gateways include the ALTA Ethernet Gateway 3, Ethernet Gateway 4, 2G Cellular Gateway, 3G Cellular Gateway, LTE Gateway, and IoT Gateway.
Unsupported gateways include the ALTA Wireless Sensor Adapter, Serial MODBUS, and Edge.
Steps
Step 1—Log into iMonnit as an Administrator User.
Step 2—Purchase the Gateway Unlock Credit.
- Select Credits in the main Navigation menu on the left-hand side of the page.
- Select Gateway Unlock.
- At the bottom, make sure Monnit Gateway - Unlock | $Price is selected.
- Type the desired quantity under the Quantity field.
- Select Checkout.
Once checkout is completed, a code will be sent to your e-mail so you can redeem your Gateway Unlock Credit.
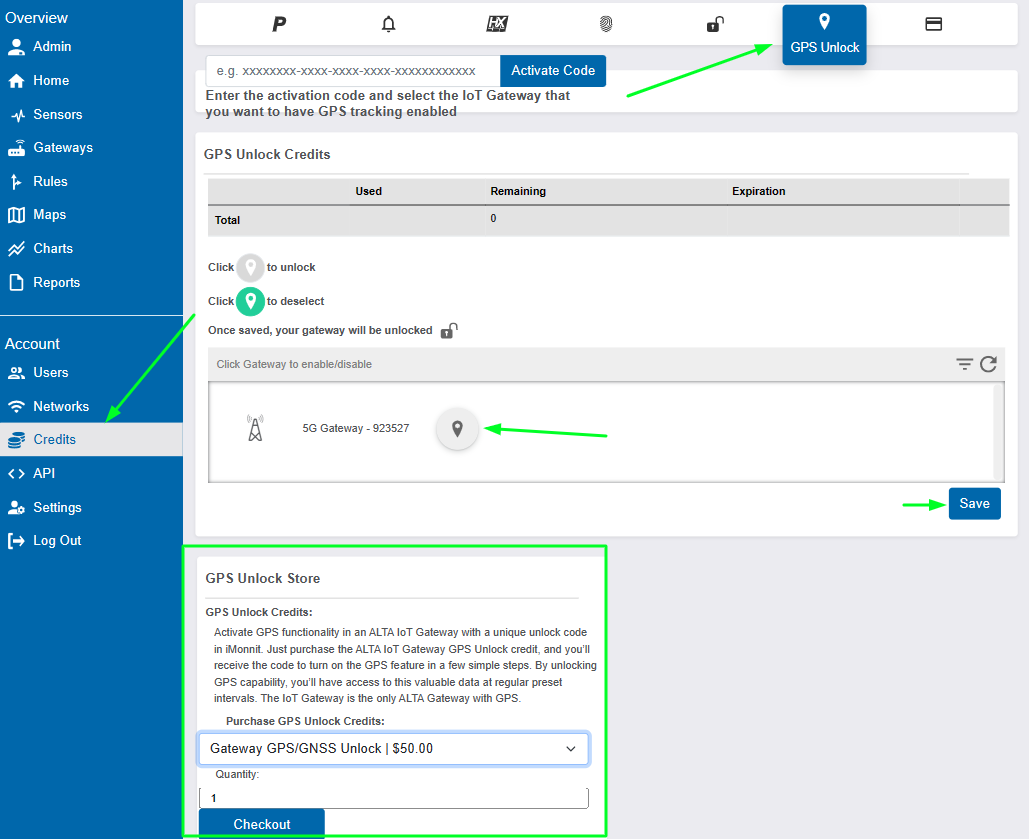
Step 3—Redeem the Gateway Unlock Credit.
- Make sure you are on the Gateway Unlock page.
- Paste the Unlock Code sent to your e-mail on the Activate Code field.
A confirmation page will show up; select OK.

Step 4—Apply the Gateway Unlock Credit to your gateway.
- Confirm you see an available Credit shown under the Remaining column.
- Select the Lock by the gateway you wish to unlock; the icon will turn green.
- Select Save.
- Your gateway will subsequently be unlocked for use on any other Monnit platform (or to disable the Default Interface.
The gateway will be unlocked on the next Heartbeat after following the steps above.