Add Notes to a Sensor Reading in iMonnit
You can add notes to a recorded reading in iMonnit. It's useful for providing a sensor event description, documenting a calibration, or other similar events. Once the note is created, you can go back and view or create a Report which exports the notes for a specific date range.
Adding Notes
- Log into iMonnit.
- Select Sensors in the navigation menu.
- Select the desired sensor.
- Select the Readings tab.
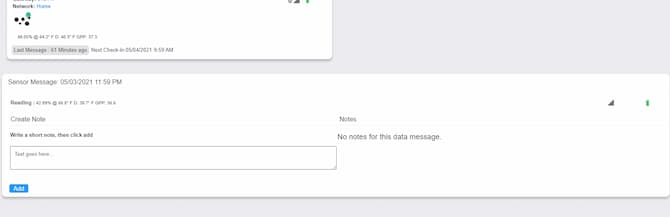
- Locate the reading record in the desired date range.
- Select the reading.
- View the logged Note page.
- Enter the text for the Note.
- Click Add.
After You Add the Note
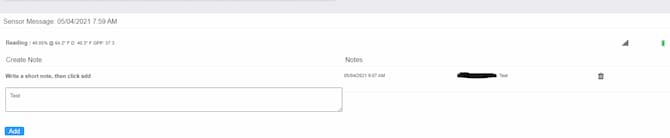
Readings that have a note added, display an icon of a paper with lines inside. This is how you can identify readings that have associated notes.
![]()
After the Note has been added, it can be viewed by clicking on the reading to which the Note was added, on the right side of the Sensor Message pane.
Create Logged Notes Reports
In addition to accessing the notes in the Sensor Readings view, you can also create a Report which contains the logged notes for an account.
- Log into iMonnit.
- Select Reports.
- Select the + Add Report button.
- Select the Administrative category.
- Select the Logged Notes Report.
- Name the Report.
- If you wish the Report to be emailed, check the Send Report as Attachment* checkbox.
- Select From Date and To Date.
- Click Save.
- An email will be sent to the User that created the Report once it has run.
- A CSV file will be generated containing all of the Logged Notes for the applicable date range.