Moving Sensors Between Networks in iMonnit
Watch the video or read the article below to learn how to move your ALTA Wireless Sensors between your existing networks. You can make a move without having to delete and re-add them from the Sensors or Networks pages in iMonnit.
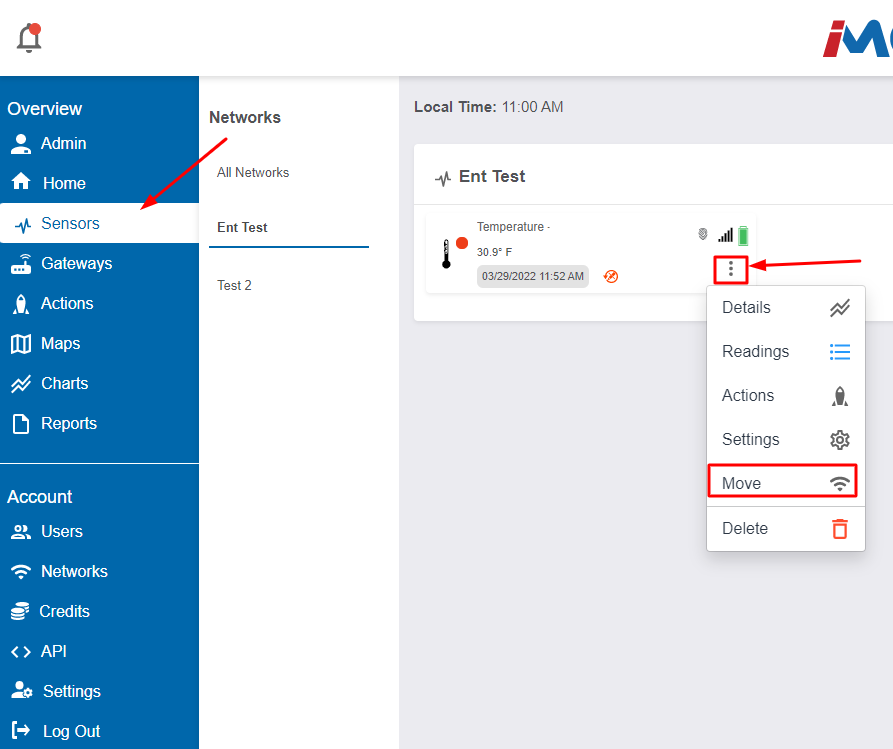
Step 1—Select Move
Move sensors to another network from the Sensors page or dashboard.
- Select Sensors on the left main menu.
- Click the vertical ellipses (three dots) on the tile of the sensor you want to move.
Select Move.
iMonnit - Move Sensor from Network
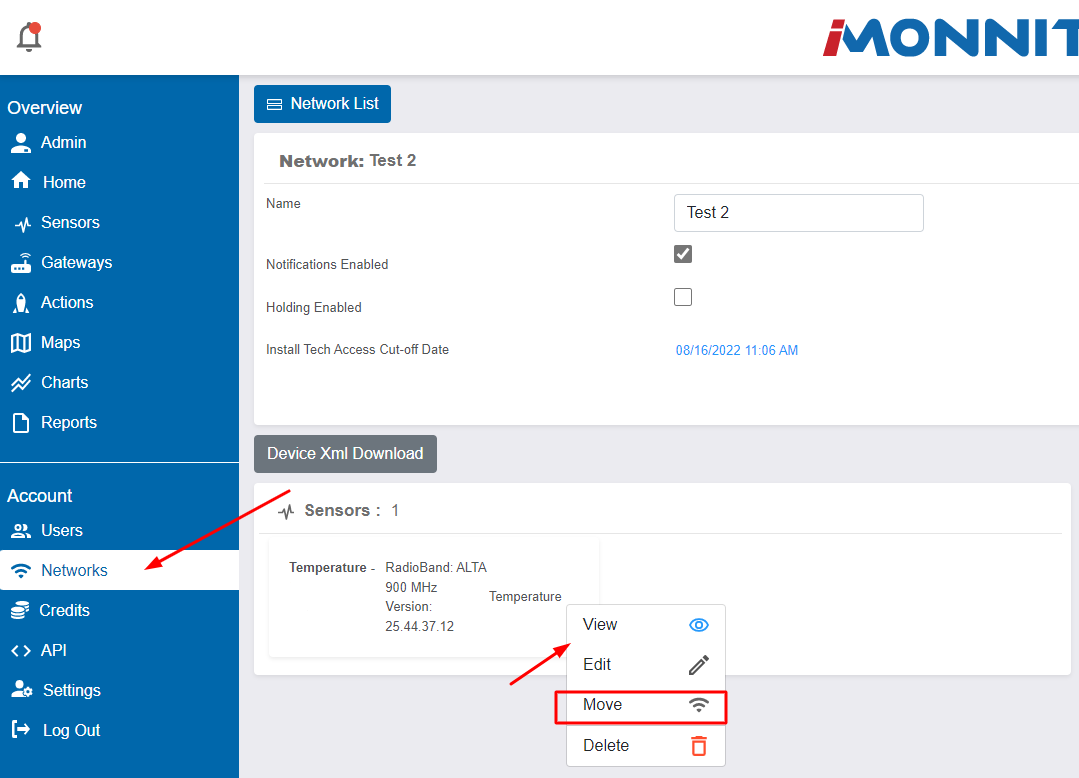
Move sensors from the Networks page.
- Select Networks on the left main menu.
- Click the vertical ellipses (three dots) on the tile of the sensor you want to move.
Select Move.
iMonnit - Move Sensor from Networks
Step 2—Select Target Network
- Choose the network from the drop-down list in the top-right section where you want to move the sensor.
Confirm Sensor’s ID and Security Code.

iMonnit - Move to Network Sensor ID SC
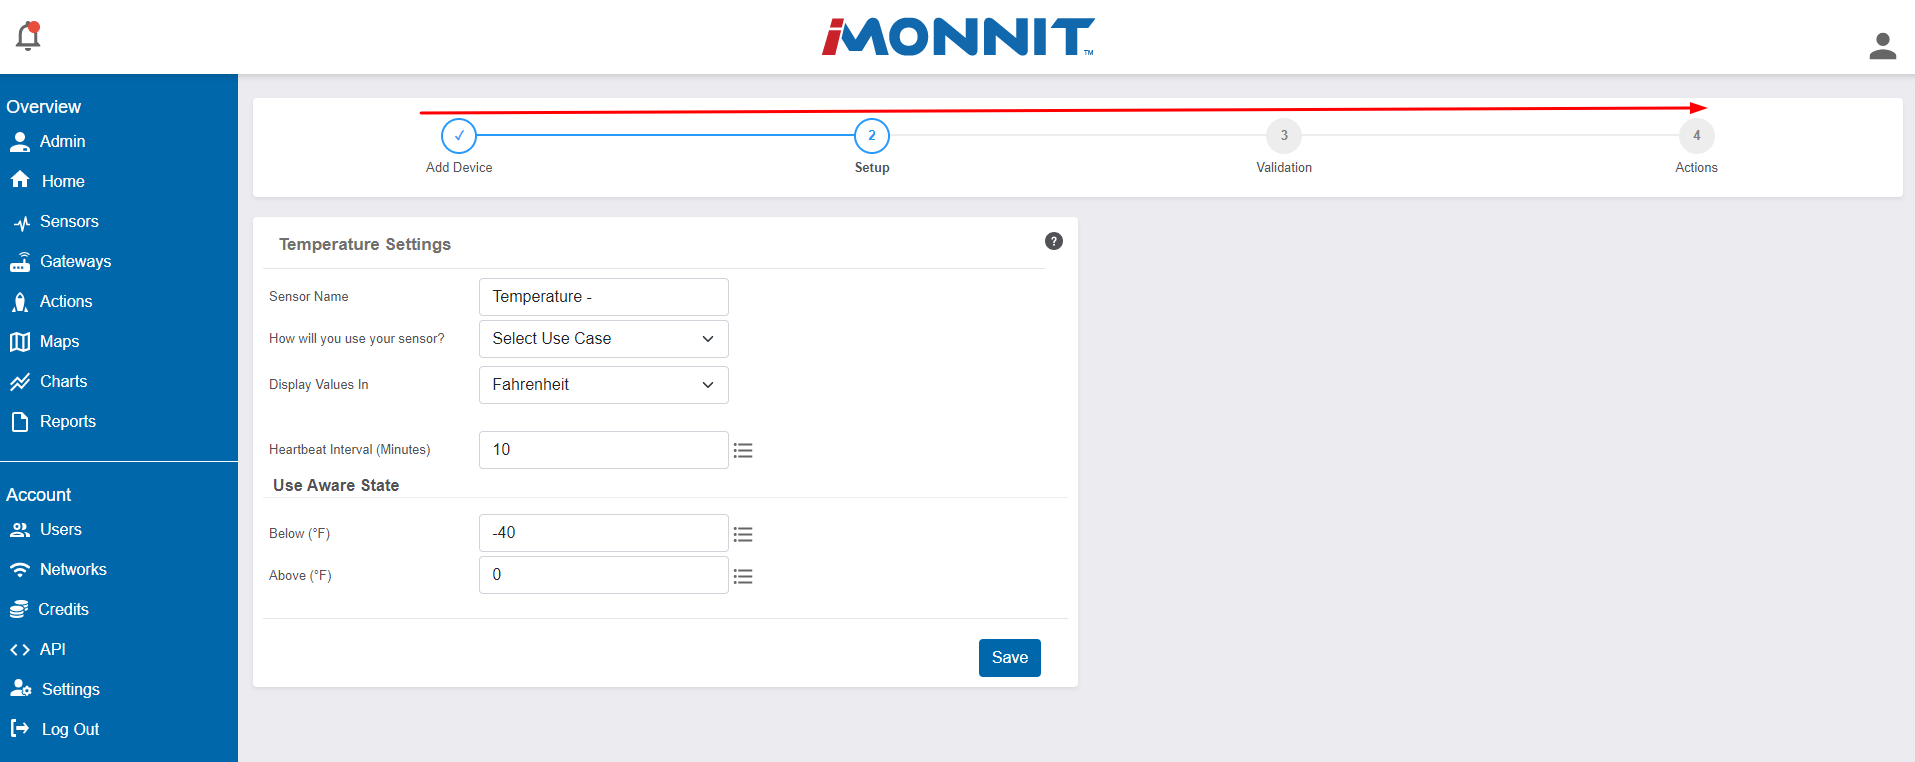
Step 3—Confirm Configurations
You may skip this step if your settings don’t need to be changed. If you need to change the settings, this is a good opportunity to do it. The software will guide you through all of the sensor’s setting configurations.
Step 4—Reform Gateways
Be sure to reform the ALTA Gateway on the network the sensor is moving from and the gateway on the new network.
Step 5—Confirm Move
At this point, your sensor is on a new network. You can confirm this by locating the sensor under the Sensors or Networks pages. The sensor won’t deliver data until its next Heartbeat Interval.