How to Integrate Sensor Data From iMonnit into an MQTT Endpoint or Cloud Broker
If you need to transport data and store it with mainstream cloud providers and brokers via the popular lightweight IoT protocol—Message Queuing Telemetry Transport (MQTT)—iMonnit has a new webhook for you.
The iMonnit MQTT Webhook helps you transport data from iMonnit to your network, private cloud, or your designated MQTT broker seamlessly and securely using the MQTT protocol.
It’s easy to set up the MQTT Webhook in iMonnit. Consider it as simple as setting up a business email account on your smartphone. In a few minutes, you can configure the feature to transmit sensor data in the MQTT protocol to a broker for storage, analysis, or action. Brokers include those associated with Amazon Web Services (AWS) IoT Core, Microsoft Azure IoT Hub, Google Cloud IoT Core, and others.
With the MQTT Webhook, you can:
- Attach Added Security: Authenticate data with a unique cryptographic validation fingerprint.
- Automatically Ingest Data: Configure it to move MQTT data into cloud broker and other data systems without needing a developer.
- Aggregate Data Sources: Combine Monnit Sensor MQTT data with streaming data from disparate sources and systems into your cloud broker services.
- Ensure Data Availability: Automate data backup and transport. Like other iMonnit Webhooks, the MQTT Webhook features automatic storage on Monnit Servers, retries, deliveries, and validation.
REQUIREMENTS
- Active iMonnit Premiere subscription
- Devices delivering data to iMonnit Online
- Valid Internet-assessible endpoint configured with an MQTT broker and prepared to receive MQTT data
- Security configurations/credentials required by the endpoint to receive data
Configure a Webhook to Deliver to an MQTT Endpoint
A Data Push sends data to your endpoint when data is received at the server. As mentioned above, the MQTT integration available in iMonnit uses Webhooks to deliver data to the desired endpoint as per the steps below.
- Log into iMonnit.
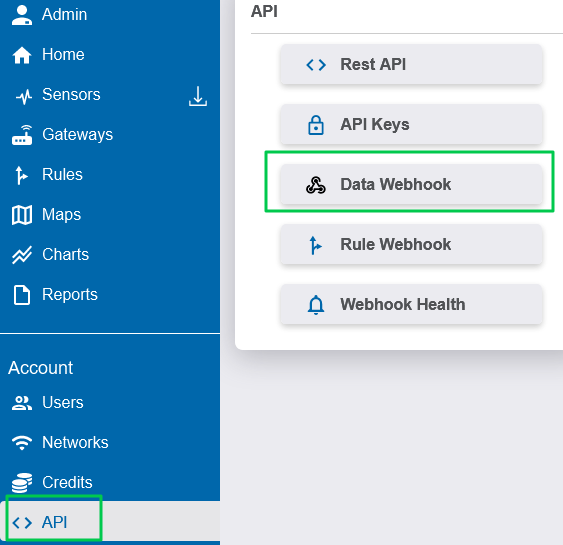
- Select <>API in the main navigation menu.
Select Data Webhook.
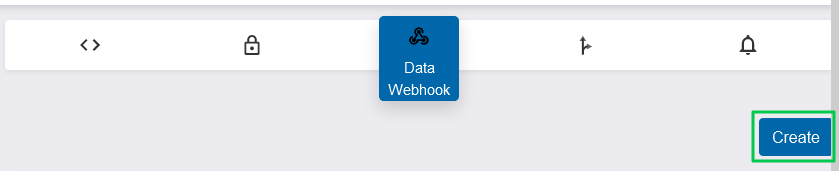
iMonnit - API - Webhook - Select the Create button (if a Webhook exists already, the button will say Configure).
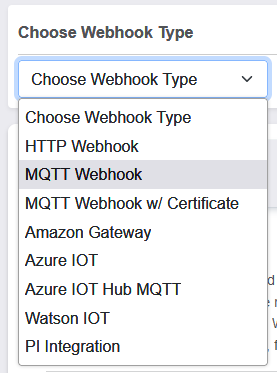
- Select MQTT Webhook or MQTT Webhook with Certificate if a security certificate is required to deliver to your endpoint.
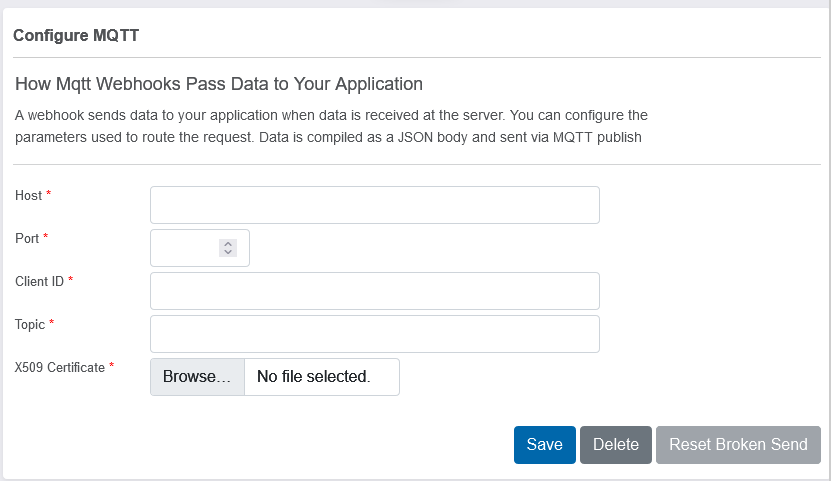
- Enter the configuration for your endpoint.
Configurations include Host, Port, Client ID, Topic, Username, Password, Use Encryption, and X509 Certificate.
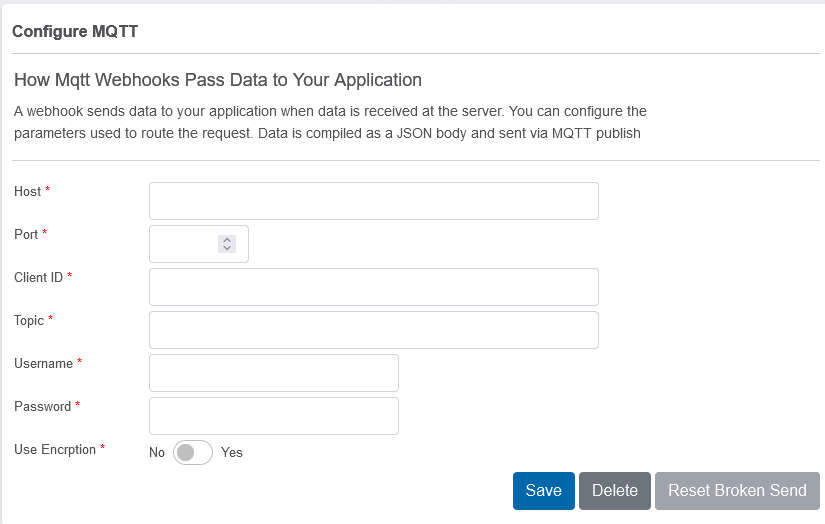
iMonnit - Webhook - MQTT Configure
- Click Save.
Data will start transmitting to the MQTT endpoint when received at the server.
Attempts & Retries
Each message is attempted up to four times unless the total consecutive failure count for all attempts hits 20. After 20 consecutive failures, each message is only attempted once, up to 100 total consecutive failures. After 100 consecutive failures, the webhook is suspended until it is manually reset.
- The first attempt is queued immediately (typically delivered within a few seconds).
- The second attempt is queued after two minutes.
- The third attempt is queued after 15 minutes.
- The fourth attempt is queued after one hour.
- Subsequent attempts are only sent after manually being manually re-queued.
There is a second limit of 10 total attempts that can be sent. After 10 failed attempts of a particular message (four auto attempts + six manual resend commands), you will need to contact Support to release that message.