Adding Devices to an Offline iMonnit Enterprise Server Using Device XML Download
Adding devices to an iMonnit Enterprise server while it is not connected to the Internet
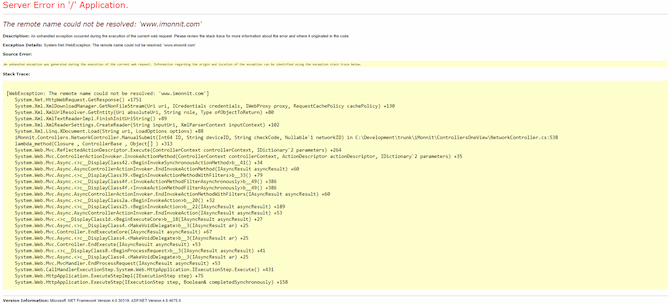
iMonnit Enterprise utilized an Internet connection by default to automatically download device metadata when adding the device to your Enterprise portal/database. If no Internet connection is present, you will see a 404 error or a “Server Error in ‘/’ Application. The remote name could not be resolved: ‘www.imonnit.com’” when adding a device. You will need to manually add the device. The process for manually adding devices entails adding the devices to the www.imonnit.com Online Sensors portal via the Internet, then downloading a XML file which contains all of the sensor metadata, transferring that file to your Enterprise server, then uploading it to the server. This article will provide the steps for accomplishing this task.
Note: this error differs in legacy versions of Enterprise. For versions of Enterprise prior to 4.0, see the following article: iMonnit Enterprise - When Adding Device “could not be transferred to a new network”
Downloading all device ID’s from a Sensor Network to a XML file
To add the devices to Enterprise when there is no internet connection you will want to generate an XML file on iMonnit online with all the devices inside a network, then you can import the file to your Enterprise portal. This XML file will contain metadata for all the devices on the selected network, so make sure to only have the devices you want on Enterprise on that network.
Part 1 – Create the XML file
Create XML with all the devices on a network you want to later import into enterprise – This part will all be done in iMonnit Online –www.imonnit.com
- Find a computer with internet access
- Log in into iMonnit Online www.imonnit.com
- Optional Create a new network
- Select Settings in the main navigation menu.
Select the Networks button toward the top of the page.

On the top right corner you will see a “+ New Network” button, select it

- Give the Network a name
- Select Save


Add the devices to the desired network


- Select the network
- On the right side of the screen you will see a “Add Device to Network +” button, select it
- Select the network you want the device added on
- Select the “Add One Device” button
- Enter the Device ID and Code into the respective boxes
- Select Add Device
- Repeat this process for each device you want to add.
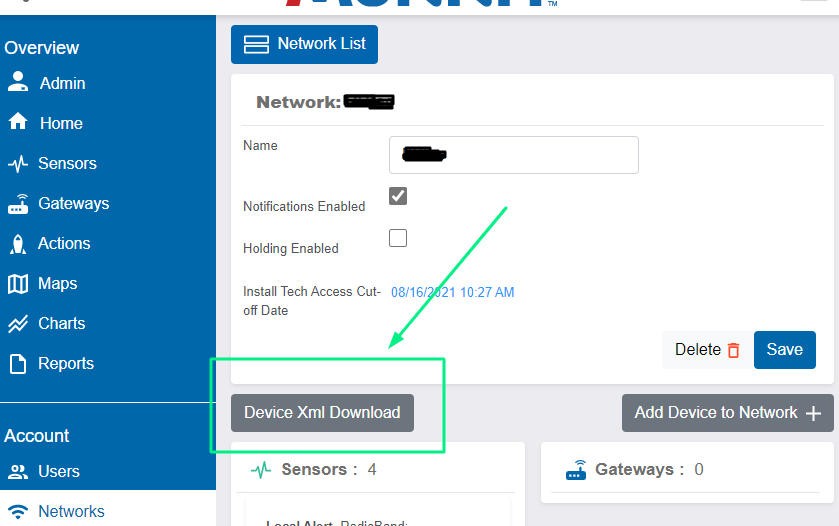
- After all the devices are added to the desired network download the metadata of the entire network and it’s devices
- Click on the network
Under the first details of the network click on the “Device Xml Download” link
Part 2 – Import the XML file into Enterprise
NOTE: since all the metadata you need to import the devices to Enterprise are in the XML file, feel free to transfer the file to the server using your preferred method.
- Go to the Enterprise portal and Log In using the top level Admin
- Click on “Networks” on the left side of the screen
- Create a network or select an existing one
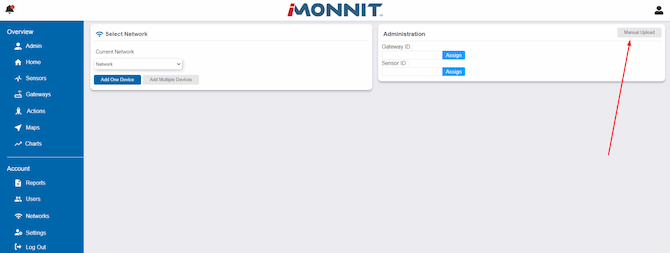
- Click on the “Add Device to Network +” button
On the top right corner, select “Manual Upload”
Manual Upload - Upload the XML file
- Choose the Network to which you want the devices added
Select choose file

Upload XML - Locate the previously created XML file
- Select file and then Open
- Click on the blue “Upload” button
- Select Done
Conclusion
The process of manually adding devices to an offline Enterprise does require the use of the iMonnit Online portal. If you need additional guidance, please contact support@monnit.com.