MoWi Wi-Fi Sensor - If You Do Not See "Wi-Fi Sensor Connected"
If you do not see the image indicating “Wi-Fi Sensor Connected” in step 3 after connecting your sensor to your PC
In order to configure your MoWi Wi-Fi sensor, your sensor will need to be recognized by the MoWi Wi-Fi Configuration Utility.

If you are unable to get your PC to recognize the MoWi sensor, this article should help you to do so.
Confirm the cable is recognized by Device Manager in Windows
- Start with the MoWi Programming Cable disconnected from the PC and the sensor.
- Confirm you are operating in Windows 8 or 10 operating system.
- Launch Device Manager in Windows (steps for this can be found here).
- Locate the category Ports COM & LPT and expand it.
Connect the MoWi Programming Cable to a USB port on the PC (not a USB port expander/hub).
You will likely see the Device Manager window refresh.
Locate the Silicon Labs device (likely labeled CP210x). If there is not yet an associated driver, the device may show up as an unrecognized USB device. As long as the cable is recognized by the PC, continue.
If you disconnect and reconnect the cable from the USB port on the PC, you should see the Device Manager window refresh after each connection/disconnection. This is a good way to confirm that the cable is being recognized by your PC. If you do not see Device Manager recognize the cable, test it on another PC by repeating steps above.
If the cable has been tested with multiple PC’s and is not recognized, you can purchase a replacement cable here.
Install the driver
- Download the correct driver. The ZIP file including the correct driver version can be found here.
- Unzip the downloaded ZIP file as per instructions found here.
Right click the correct version for your PC, and select “Run as Administrator”.
For 64-bit PC’s run the CP210xVCPInstaller_x64.exe
For 32-bit PC’s run the CP210xVCPInstaller_x86.exe
Confirm the correct driver is being used
In Device Manager:
- Locate the category Ports COM & LPT and expand it.
- Locate the Silicon Labs device (likely labeled CP210x) item, right click, and select Properties.
- Click the Driver tab.
- Confirm the Driver Version is listed as 6.7.6.
The driver at the above link installs driver version 6.7.6. This driver is confirmed to be working on Windows 8 and 10 with the MoWi Programming cable. There is a newer driver version 10 which has been found to not be consistently supported. Therefore it is recommended that driver version 6.7.6 is installed and used.
If you see a different version of the driver other than 6.7.6, proceed to uninstalland deletethe existing driver version. Step for this can be found here.
Connect the sensor
If the correct driver is installed and the cable is recognized:
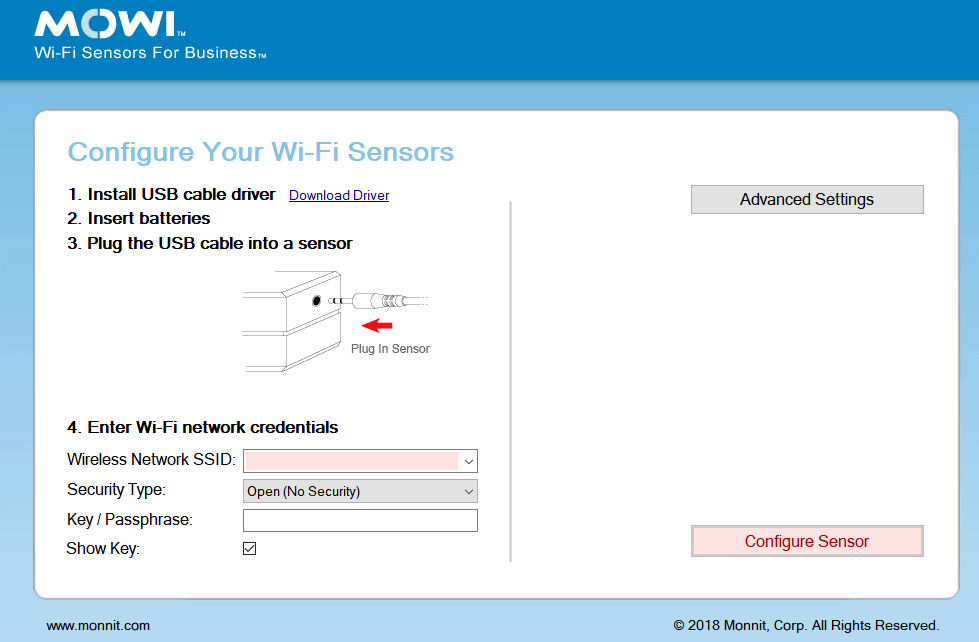
- Connect the sensor to the MoWi Programming Cable as per the image below.
- Insert known-good batteries into the sensor.
Your sensor will power and be recognized by the computer even with low batteries. But if the batteries do not have enough voltage to power the radio, the sensor will be unable to connect to the network. Therefore it can seem misleading if the sensor LED is active. It is still possible that your batteries are low, even if the LED is illuminated. Therefore testing with new known-good batteries is imperative.
You should see the LED’s on the senor alternating green/red flashing indefinitely (or only flashing red if the sensor has never been configured). This indicates the sensor is communicating and prepared to be configured.
If you do not see “Wi-Fi Sensor Connected” displayed for step 3 of the utility after executing the steps above, try testing this on another PC.