Apply a Schedule to an ALTA Sensor
As part of the management of sensors, a user is able to set a schedule for a sensor that will determine if it will be collecting data during a scheduled time frame.
During the time the sensor is scheduled off, it will record no data. However, there are circumstances in which you might observe a sensor delivering data as noted in the last section of this article.
Access the Schedule Sensor feature
- Log into iMonnit with a User that has adequate permissions.
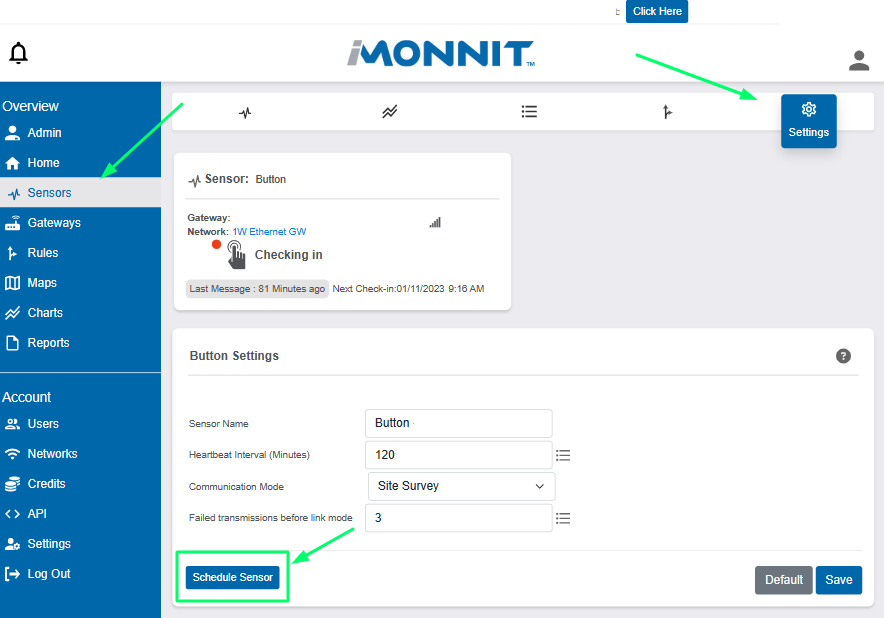
- Click Sensors.
- Click the desired sensor.
- Click Settings toward the top of the page (gear Icon).
- Click Schedule Sensor at the bottom left of the settings page.
Support for the Schedule feature depends on the age, firmware version, and sensor type. If the Schedule Sensor button is not visible, then the device is not supported.
Set the Time Zone Offset
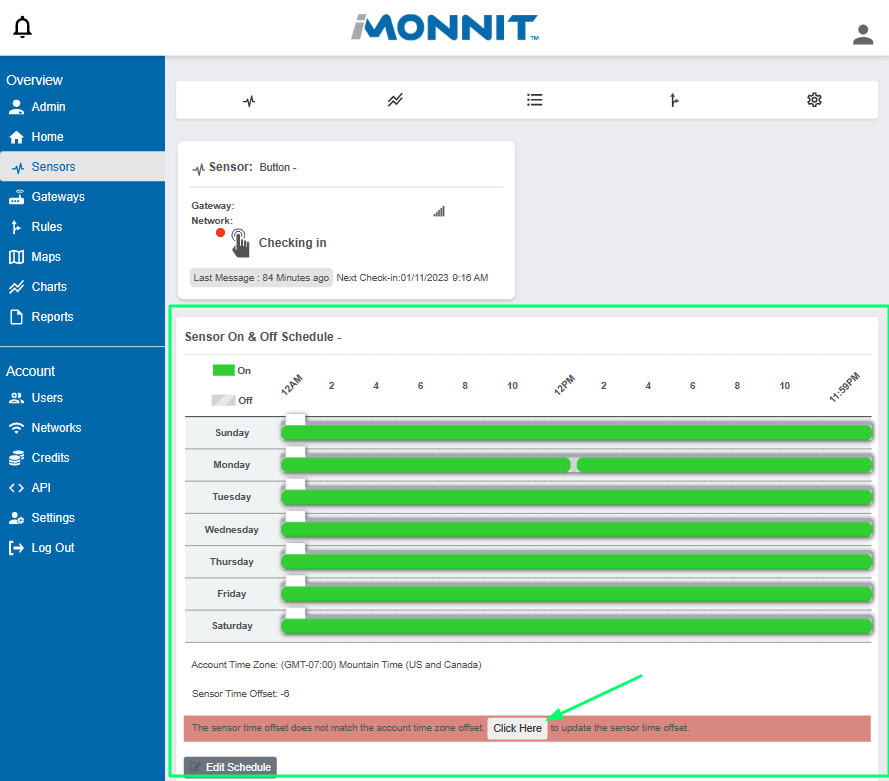
Before a schedule can be applied, the software will require that the Time Zone Offset on the sensor matches the account’s time zone.
Click the Click Here button on the red section of the Schedule Sensor page. If the sensor’s Time Zone Offset has already been set, this section will not be visible.
Set a schedule for the Sensor
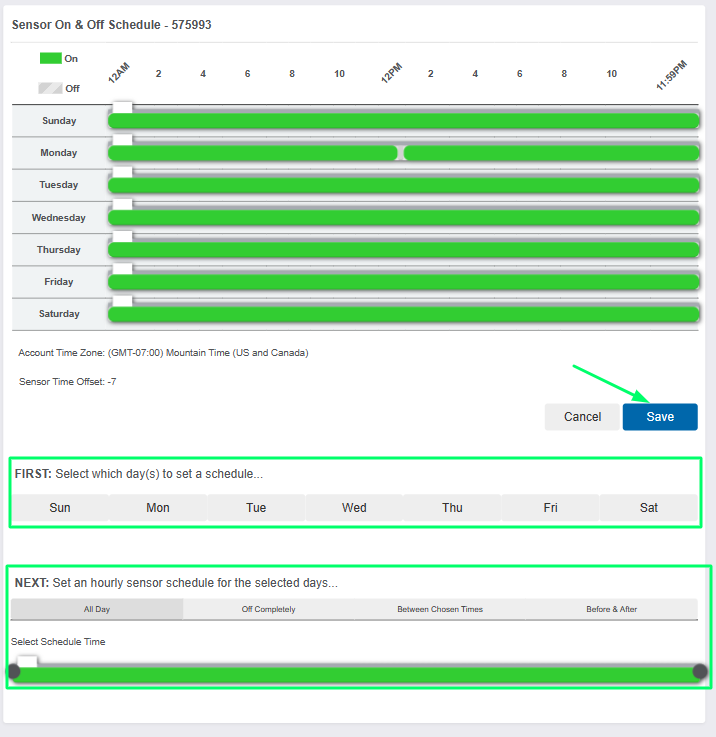
The top portion of the Schedule Sensor pane will display the current schedule. The bottom portion of the pane will be used to enter a new schedule.
- Select the days for which you intend to modify the schedule. Any days not selected will maintain the existing schedule as shown in the top pane.
- Select the schedule type from the four available options:
- All Day - Sensor will collect data at all hours of the selected day(s).
- Off Completely - Sensor will not run the selected day(s).
- Between Chosen Times - Sensor will collect data between the given start and end times.
- Before & After - Sensor will collect data before and after the given end and start times.
Warning: Be sure to consider the characteristics of the Before and After election as described in this article. - Using the schedule slider, select the desired hourly schedule.
- Click the Save button.
The sensor will accept the configuration upon its subsequent communication. However, the schedule may take up to 48 hours to be executed.
A sensor transmitting data off-schedule
There are select conditions during which a sensor may still transmit data off-schedule as listed below.
- The sensor maintains link with the gateway during off periods to maintain good time by sending ping messages that don’t go up to iMonnit. If one of these messages fails the sensor follows standard retry rules and if the message will not go through the sensor will go into link mode. Sensors will ALWAYS send a message when it links with a gateway.
- If the sensor has a UX button and that button is pressed, the sensor will send a single message then go back to being off.
- If the sensor reboots for any reason the sensor will deliver all test message while in an off period.
- If the sensor had a clock loss issue and rebooted the sensor would send messages. Look for test messages for confirmation of a reboot of any kind.