Vehicle Detect Sensor Installation Guide
Sensor Overview
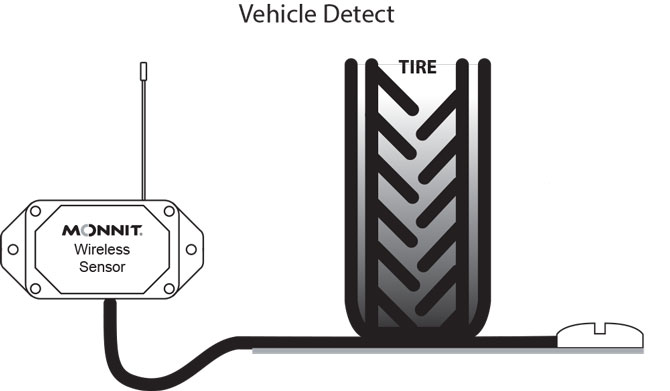
The Industrial ALTA Wireless Vehicle Detect / Counter Sensor uses a pressure-activated switch to detect or count vehicles that drive over the 9-ft. pneumatic tube.
Installation Steps
If this is your first time setting up your Monnit system, you must first set up your iMonnit account and connect your ALTA Gateway to iMonnit before registering your sensor. See this article for steps outlining how to get started: Creating an iMonnit account.
Step 1.
Remove the sensor from the package and attach the antenna.
Step 2.
Register the sensor in iMonnit. Do not use the magnetic switch to power the sensor until told to do so in iMonnit.
Step 3.
Determine the sensor’s installation location. We recommend placing the sensor in the location and making sure it reports to the gateway before final installation. See this article if you’re using an ALTA Site Survey Tool to perform a site survey to determine sensor installation location.
Step 4.
After ensuring that the sensor is communicating with the gateway, insert the male end of the pneumatic tube quick connect hose coupling (QCHC) into the female QCHC on the sensor housing by pushing the collar of the female coupling down, inserting the male end, and then releasing the collar.
Failure to firmly secure the connectors will lead to inaccurate readings or errors.
Step 5.
Roll out the pneumatic tube over the area you wish to monitor. Secure the hose anchor by hammering in the provided 3 1/4" wedge anchor bolts into the holes on the anchor.
Step 6.
Mount or secure the sensor housing by a method that suits your application, taking care to place the sensor in an area it won’t get damaged.