Water Puck Sensor Installation Guide
Sensor Overview
The ALTA Wireless Water Detection Puck Sensor detects when water is present by completing the circuit between the two probe points (exposed stainless steel metal screw heads) on the bottom of the sensor. When the detection state changes (water present or absent), the Water Puck Sensor will immediately turn on the radio and transmit the data to the wireless gateway and the iMonnit Online Sensor Monitoring and Notification System. Once data is in iMonnit, the user-configurable notification system can send emails, text messages, and automated phone calls to alert you of any changes to the sensor. The sensor detects both the presence and absence of water.
Installation Steps
If this is your first time setting up your Monnit system, you must first set up your iMonnit account and connect your ALTA Gateway to iMonnit before registering your sensor. See this article for steps outlining how to get started: Creating an iMonnit account.
Step 1.
Remove the sensor from the package. Take care not to throw away the supplied magnet.
Step 2.
Register the sensor in iMonnit. Do not activate the reed switch until told to do so in iMonnit.
Magnetic Reed Switch and LED Behavior

The Water Puck Sensor comes with a small but powerful magnet. This controls the power state of the puck.
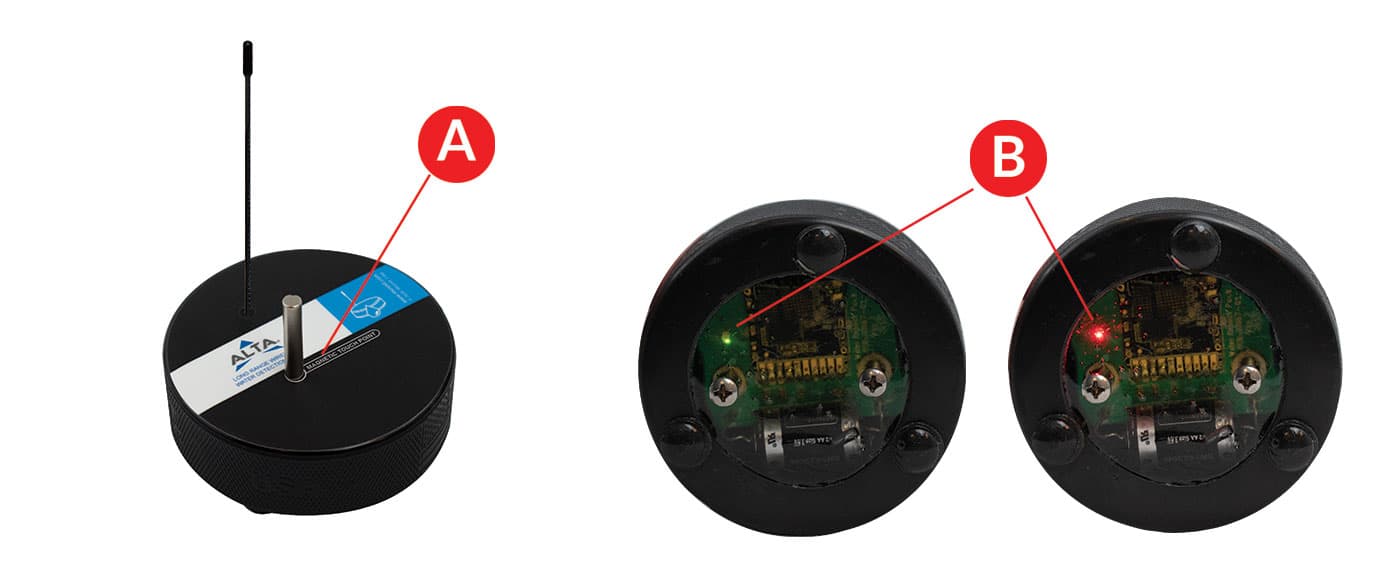
Using the magnet will trigger the following reactions from the embedded LED, visible from the underside of the Puck (B).
The area marked by the label on the top of the Water Puck indicates the hot spot location for effective use of the magnetic power control (A).
Bring the magnet in range of (A) and the LED will illuminate indicating the power state.
- Solid Green: Powered ON, connected to a gateway.
- Flash Red then Solid Green: Powered ON, not connected to a gateway.
- Solid Red: Powered OFF, not connected to a gateway.
If the magnet is still held in place for two seconds after the LED illuminates, the LED will flash rapidly.
- Flash Green: Will turn ON after the magnet is removed
- Flash Red: Will turn OFF after the magnet is removed
The sensor will change its power state if the magnet is removed after holding it in place (A) for over two seconds.
- Single Slow Green Flash: Turning ON or powered ON
- Single Slow Red Flash: Turning OFF
Step 3.
Determine the sensor’s installation location. We recommend placing the sensor in the location and making sure it reports to the gateway before final installation. See this article if you’re using an ALTA Site Survey Tool to perform a site survey to determine sensor installation location.
Step 4.
After ensuring that the sensor is communicating with the gateway, place the Water Puck in the area you wish to monitor the presence or non-presence of water.
Detection level must be ~1.6mm high/low to trigger detection.