How to Add Devices in iMonnit
f this is your first time using iMonnit, you will need to create a new account. If you have already created an account, start by logging in. For instructions on how to register and set up your iMonnit account, please consult the iMonnit User Guide.
(Click here to watch a video detailing these steps.)
Step 1: Add Device
1. Add the sensor on iMonnit. Add a sensor to your account by choosing Sensors in the main menu. Navigate to the Add Sensor button.

or

2. Find the Device ID. The Device ID (ID) and Security Code (SC) are necessary to add a sensor. These can both be located on the label on the side of your device.
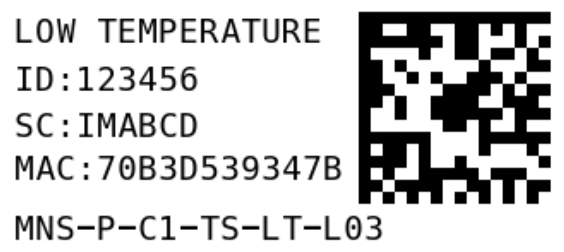
3. Adding your device. Use the camera on your smartphone to scan the QR code on your device. If you do not have a camera on your phone, or the system is not accepting the QR code, you may enter the Device ID and Security Code manually. The Device ID is a unique number located on each device label. Next, you’ll be asked to enter the Security Code from your device. A Security Code consists of letters and must be entered in upper case (no numbers). It can also be found not the barcode label of your device.

When completed, select the Add Device button.
Step 2: Setup
Select your use case. To get you up and running fast, your sensor comes with preset use cases. Choose from the list or create your own custom settings. You will see the heartbeat interval and aware state settings.
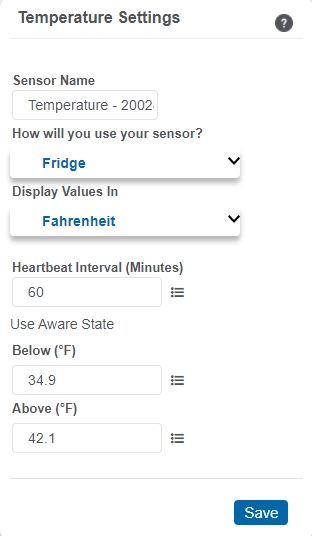
Select the Save button when completed.
Step 3: Validation
The validation checklist will help you ensure your sensor communicates with the gateway properly and has a strong signal.
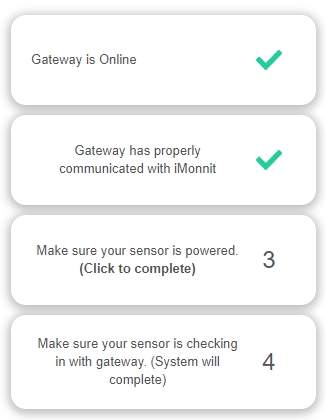
1. Gateway is Online: Ensure that the gateway is registered to iMonnit and is connected to power with antenna(s) or an Ethernet cable, allowing it to communicate with the Internet.
2. Gateway has properly communicated with iMonnit: This step will autocomplete if the gateway communicates with iMonnit. Press the utility button on the gateway to ensure the gateway has an updated sensor list and speed up this process.
3. Make sure your sensor is powered: Most sensors don’t have an on/off switch and will pair with the gateway as soon as they can achieve communication through a Heartbeat. Some sensors, such as industrial sensors, the Water Puck, and Vehicle Detect/Count, need to be switched on through a magnet or standard toggle switch. Industrial sensors also require that the included antenna be firmly attached. The sensor will communicate with the gateway every 30 seconds for the first few minutes.
4. Make sure your sensor is checking in with the gateway: Checkpoint 4 will only complete when your sensor achieves a solid connection to the gateway. Press the utility button on your Cellular Gateway or Ethernet Gateway to force communication.
Select the Save button went completed.
Step 4: Rules
Choose Your Rules. Rules are the alerts that will be sent to your phone or email in the event of an emergency. Low battery life and device inactivity are two of the most common actions to have enabled on your device.
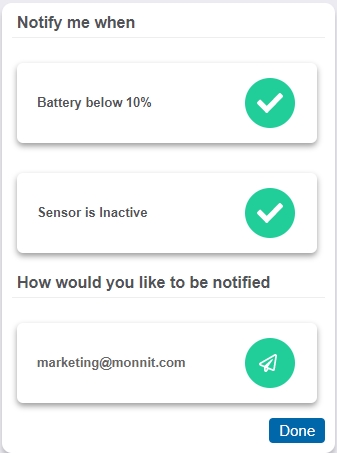
Select the Done button when completed.
Feel free to contact support@monnit.com with related inquiries.