How to Use the iMonnit Locations Feature
In the navigation menu, a new section is available—Locations. The feature will replace Networks for most users.
Note: Accounts with multiple networks will still see Networks; however, a new limit on network creation is five.
Accounts with only a single network will not see the Networks section in the navigation menu.
The Locations feature represents an upgrade in user security and access. It also allows you to generate Sub-Accounts to manage growth better.
This article will guide you in using Locations and creating Sub-Accounts.
Go to Locations
Summary of Steps
- Log into your iMonnit account.
- Select the Locations tab in the left-hand navigation sidebar.
- This brings you to your main Locations screen.
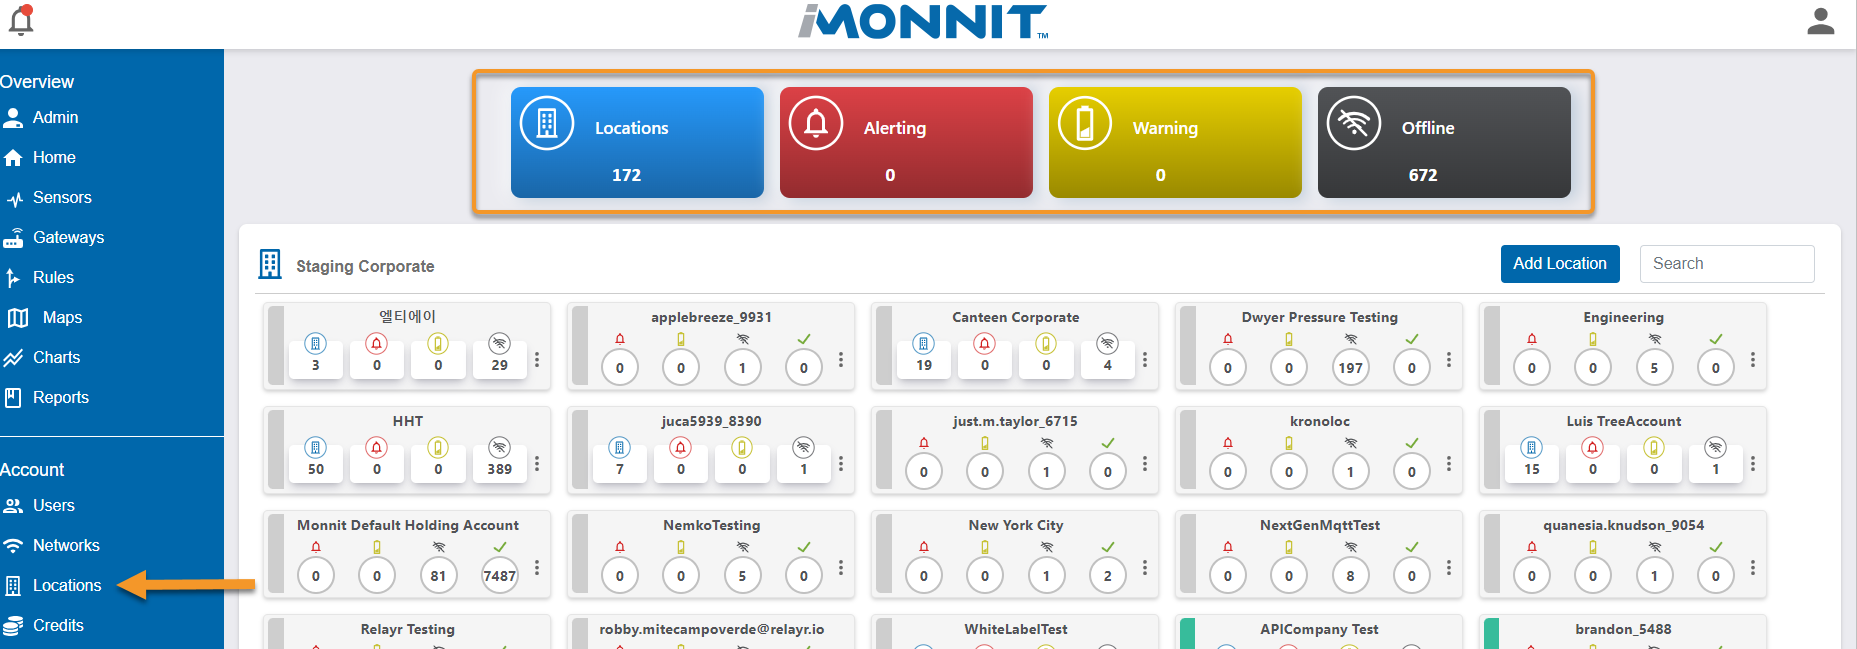
Data Cards
On the top of the Locations dashboard, you see four Data Cards.
- Locations
- Alerting
- Warning
- Offline
The card colors easily convey an overview of the status of your Locations.

Add Locations
Summary of Steps
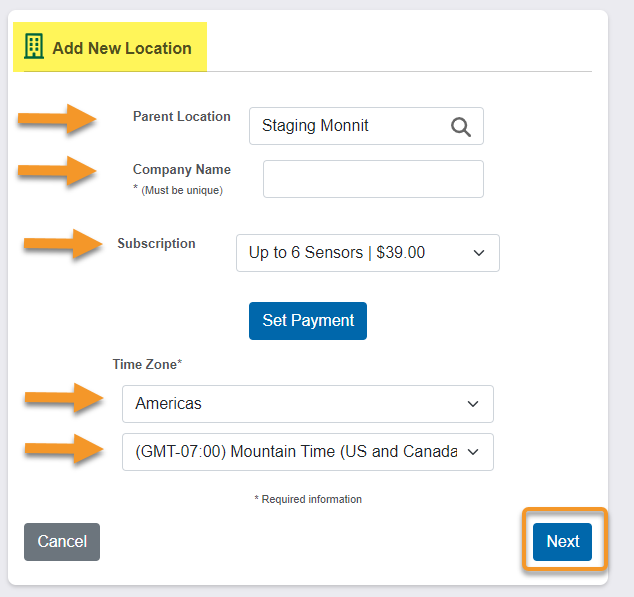
- On the Location screen, click on Add Location
- The New Location dialog box will appear.
- If this is your first Sub-Account, the Parent Location will populate the account name.
- If this is a multiple Sub-Account, you can search for the previous Company Name created to assign as a Parent Location.
- Assigning a Parent Location will determine where your new Sub-Account and tiers live. (See: Adding a Sub-Account/ Adding a Tier to Parent Accounts.)
- Add a unique Company Name in the designated field.
- Select your subscription level, and choose your payment method.
- Note: All new accounts are offered a 45-day free iMonnit Premiere trial.
- Select the applicable Region and Time Zone in the drop-down menu boxes.
- Click Next.
- A new account is now created and listed in Locations.
View an Individual Location
- Select the Locations tab in the left-hand navigation sidebar.
- This brings you to your main Locations screen.
- A list of created Sub-Accounts will populate.
- Select the specific Sub-Account you wish to view.
- After selection, if it’s a stand-alone account, you will move to the Home page for that Sub-Account.
- You will see a list of the accounts you created if it’s multiple-tiered.
- You can dive deeper and look at data for a specific Sub-Account from your multiple-tiered account.
- Notice each Sub-Account has data points that correspond to the Data Cards.
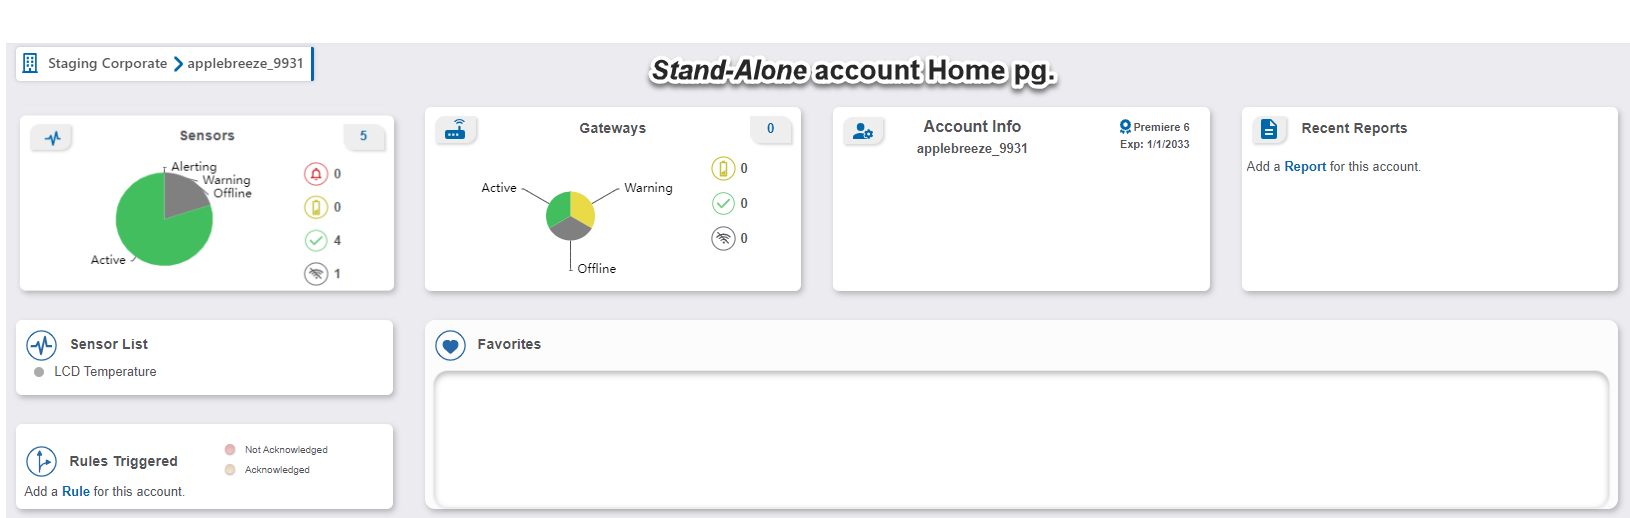
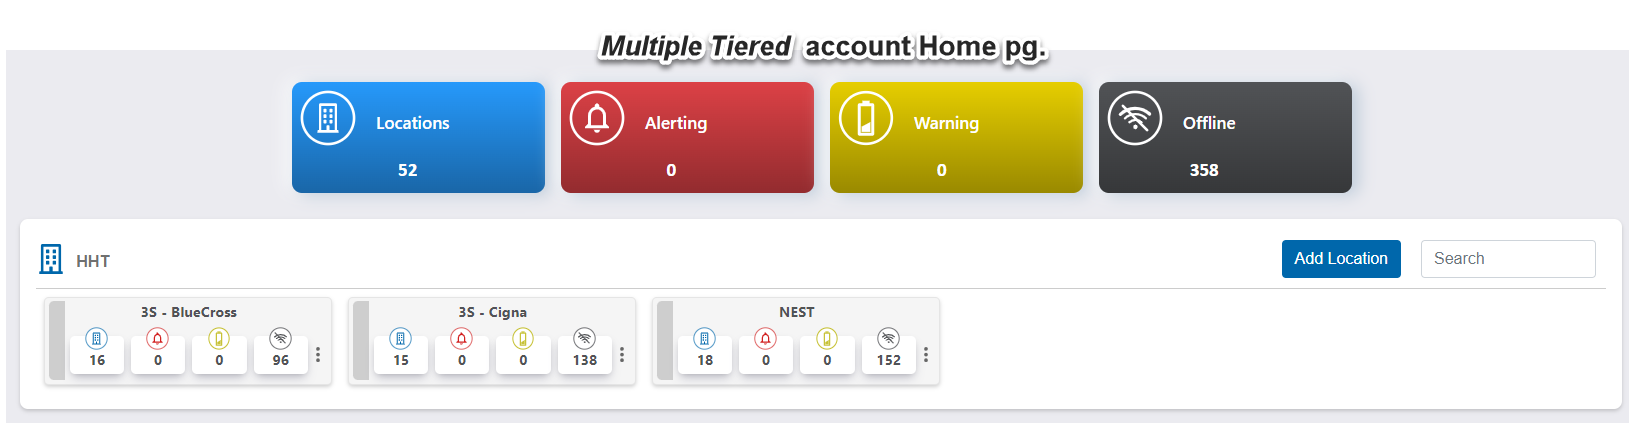
Shapes—Circles & Squares
We’ve added shapes to account cards to identify if a Sub-Account is stand-alone or multiple-tiered. Shapes are an added feature to visually confirm the depth of the account.
The shape displayed indicates the account type.
- Circles: A stand-alone account. Only one has been created.
- Squares: Multiple Sub-Accounts have been created.

Add a Sub-Account (Add a Tier)
- Log into your iMonnit account.
- Select the Locations tab in the left-hand navigation sidebar.
- This brings you to your main Locations screen.
- Click Add Location.
- The New Location dialog box will appear.
- Search for the Parent Location and select it.
- Assigning a Parent Location will determine where your new Sub-Account and tiers live.

- Select Assign as Parent.
- Add a unique Company Name in the designated field.
- Subscription Code: If you have an iMonnit Premiere subscription, you can enter it here. If not, you can skip it.
- Note: All new accounts are offered a 45-day free iMonnit Premiere trial.
- Select the applicable Region and Time Zone drop-down menu boxes.
- Click Next.
- A new account is now created and listed in Locations.

Navigation Arrow
A Navigation Arrow on the top of the screen helps map how deep you are in the account and what you’ve selected.
When you see a solid blue line at the end of the bar, you’ve reached the end of your depth.

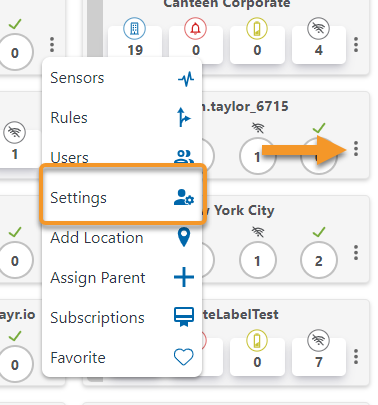
Location Cards: Three Dots
The three dots on the card are quick links to other sections in your iMonnit account. Selecting any of these takes you out of Locations and brings you to the designated function.

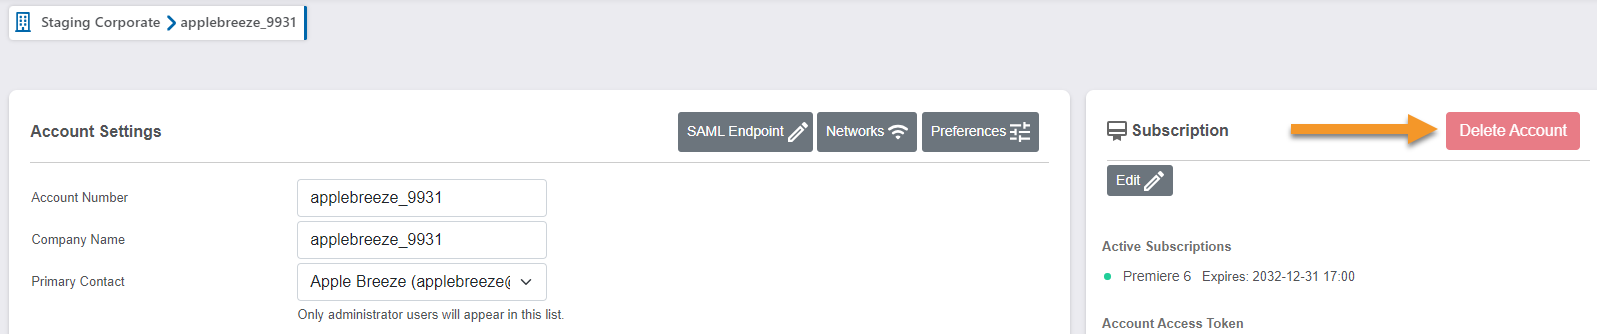
Locations: Delete an Account
You can delete the account by clicking the Delete Account button. As well as add or edit other data fields.
- To delete an account, click the mini dots in the account you wish to delete.
- Select Settings—from the Sub-Account.
- Click the Delete Account button to remove.
Conclusion
Locations is a helpful feature for scaling growth and adding security. If you have further questions, contact Monnit Support.